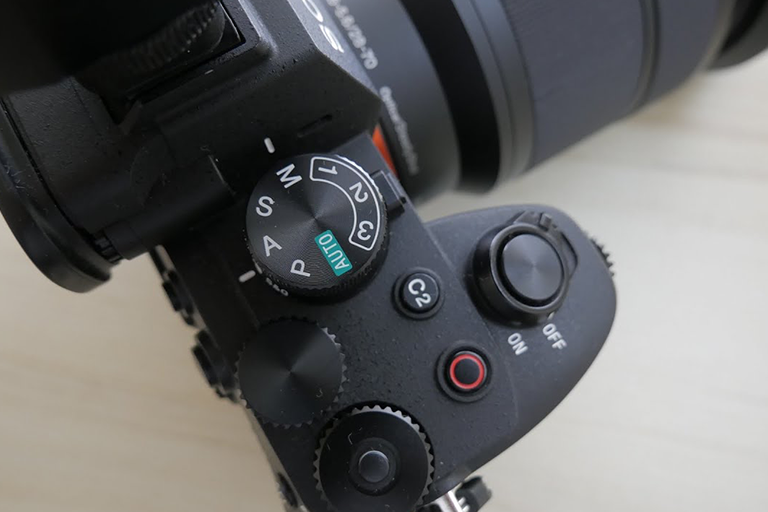
Learning to use manual mode on your camera is one of the most valuable skills in photography. While automatic settings are convenient, they limit creative control and can produce inconsistent results. Understanding camera settings allows you to shape light, depth, and exposure to achieve professional quality images.
If you are interested in portrait photography or event coverage, mastering manual mode gives you the flexibility to adapt to different lighting conditions and artistic styles. This beginner friendly guide explains the core principles of manual mode, how to adjust settings, and practical tips for learning quickly.
What Is Manual Mode?
Manual mode allows photographers to control exposure settings directly. Instead of relying on automatic adjustments, you set the aperture, ISO, and shutter speed yourself.
These three settings work together to determine how light interacts with the camera sensor. Mastering them gives you full creative control over image brightness, depth of field, and motion.
Automatic modes can be useful in certain situations, but they often make compromises. For example, the camera might choose settings that prioritise brightness over artistic depth. Manual mode removes these limitations.
Understanding the relationship between settings is the foundation of photography.
The Exposure Triangle
Photography exposure is governed by the exposure triangle, which consists of:
- Aperture
- ISO
- Shutter speed
Each element influences exposure and image appearance.
Learning how they interact is essential for successful manual mode photography.
Aperture
The aperture controls the size of the lens opening. It determines how much light reaches the sensor and affects depth of field.
A wide aperture (low f number) allows more light and creates a shallow depth of field. This is ideal for blurring backgrounds in portrait photography.
A narrow aperture (high f number) allows less light and increases depth of field. This keeps more of the scene in focus, which is useful for landscapes.
Common aperture settings include:
- 8 (very wide, shallow depth)
- f4 (moderate depth)
- f8 (greater depth)
- f16 (deep focus)
Experimenting with aperture helps you understand how it shapes image style.
ISO
ISO controls the camera’s sensitivity to light. Higher ISO settings brighten images but can introduce noise.
Low ISO values such as ISO100 or ISO200 produce clean images in good lighting. Higher values such as ISO1600 or above are useful in low light but may reduce image quality.
The goal is to use the lowest ISO that achieves proper exposure. Modern cameras handle higher ISO better than older models, but noise can still affect image clarity.
Shutter Speed
Shutter speed determines how long the camera sensor is exposed to light. It also influences motion capture.
Fast shutter speeds freeze movement. This is useful for action photography or sharp handheld shots.
Slow shutter speeds allow more light but can introduce motion blur. Tripods help stabilise the camera during long exposures.
Common shutter speed examples:
- 1/1000 (very fast, freezes action)
- 1/250 (general handheld shooting)
- 1/60 (borderline handheld, risk of blur)
- 1 second or longer (long exposure, requires tripod)
Balancing shutter speed with aperture and ISO ensures proper exposure.
How to Start Using Manual Mode
Transitioning to manual mode may feel challenging at first, but practice makes it easier.
Follow these steps:
Step 1: Set Your ISO
Begin by choosing an ISO based on lighting conditions.
- Bright daylight: ISO100 or ISO200
- Indoor lighting: ISO800 or higher
- Low light: Increase ISO as needed
Start with a low ISO and adjust only if exposure requires it.
Step 2: Choose Your Aperture
Select an aperture that suits your creative goals.
For portrait photography, use a wide aperture such as f1.8 or f2.8 to blur the background and emphasise the subject.
For landscapes, use a narrower aperture such as f8 or f11 to keep more detail in focus.
Step 3: Adjust Shutter Speed
Shutter speed controls exposure after setting aperture and ISO.
Use the camera’s exposure meter as a guide. Adjust shutter speed until the meter indicates proper exposure.
If images are too dark, slow the shutter speed. If they are too bright, increase it.
Step 4: Review and Refine
Take test shots and review results. Look for exposure balance and image sharpness.
Photography is iterative. Small adjustments lead to improvement over time.
Common Beginner Mistakes
Learning manual mode involves trial and error. These common mistakes are part of the process.
Overusing High ISO
High ISO brightens images but can introduce noise. Use the lowest ISO that achieves proper exposure.
Ignoring Shutter Speed
Slow shutter speeds can cause motion blur. If shooting handheld, use speeds of 1/60 or faster.
Forgetting to Check Exposure
Always review images and the exposure meter. Adjust settings if results are too bright or too dark.
Rushing the Process
Photography requires patience. Take time to experiment and understand how settings interact.
Tips for Learning Manual Mode
Practice accelerates learning. Here are practical tips:
- Start in well lit environments
- Use simple subjects
- Experiment with one setting at a time
- Review results and make adjustments
- Learn from mistakes
Over time, controlling settings becomes second nature.
Why Manual Mode Matters
Automatic modes are convenient, but they limit creative freedom.
Manual mode allows you to:
- Control depth of field
- Shape exposure
- Adapt to challenging lighting
- Create consistent results
- Develop photographic understanding
These skills are essential for professional photography and artistic expression.
Whether you want to improve portrait photography or explore creative techniques, manual mode provides the foundation.
Training and Professional Development
If you want structured learning, photography training sessions can accelerate progress.
Professional photographers offer beginner friendly instruction that covers:
- Camera settings
- Composition
- Lighting
- Practical exercises
Hands-on training builds confidence and understanding.
Studios that specialise in photography services often provide educational resources and guidance.
Final Thoughts
Mastering manual mode is a rewarding journey. It transforms photography from point and shoot convenience into a creative discipline. Understanding the exposure triangle and practising regularly will improve your results.
Start with small experiments. Focus on learning how settings influence exposure and image style. With time and practice, manual mode becomes intuitive.
Photography is both technical and artistic. Learning the technical side empowers creativity and expression. If you are interested in professional photography or training, many studios offer beginner friendly support and guidance.
Taking control of your camera settings opens new possibilities. It allows you to capture images exactly as you envision them. By mastering manual mode, you gain the skills needed to create high quality, meaningful photographs.